Self-paced assignments
Contents
11. Self-paced assignments#
![]()
Ocademy sets up the assignment as Test-driven Development style. The questions are unit testing alike, implemented as a bunch of Jupyter Notebooks, and visualized by jupyterlab-pytutor. A real-world code quality assurance environment is simulated. You will learn how to handle software testing while working on the assignments.
11.1. Try it out#
There are multiple ways to do exercise with the assignment in self-paced mode. You MUST use Jupyter Lab as the runtime environment.
11.1.1. Binder#
Simply click on this ![]() .
.
11.1.2. [Optional]Local#
All the assignment notebooks can be executed independently without any prerequisite, and in any Jupyter Lab environment. Below steps will guide you to create a work environment if you don’t have yet, which consists of some necessary dependencies and helpful Jupyter Lab extensions.
1. Install Python & Conda by following this.
2. Install Jupyter Lab by following this.
3. Initialize the Conda env.
# first time setup
conda env create -f environment.yml
# or update
conda env update -f environment.yml
4. Activate the Conda environment,
conda activate open-machine-learning-jupyter-book
5. Start Jupyter Lab. You are all set!
jupyter lab

11.1.3. GitHub#
To start working on the assignments, you could follow the steps below:
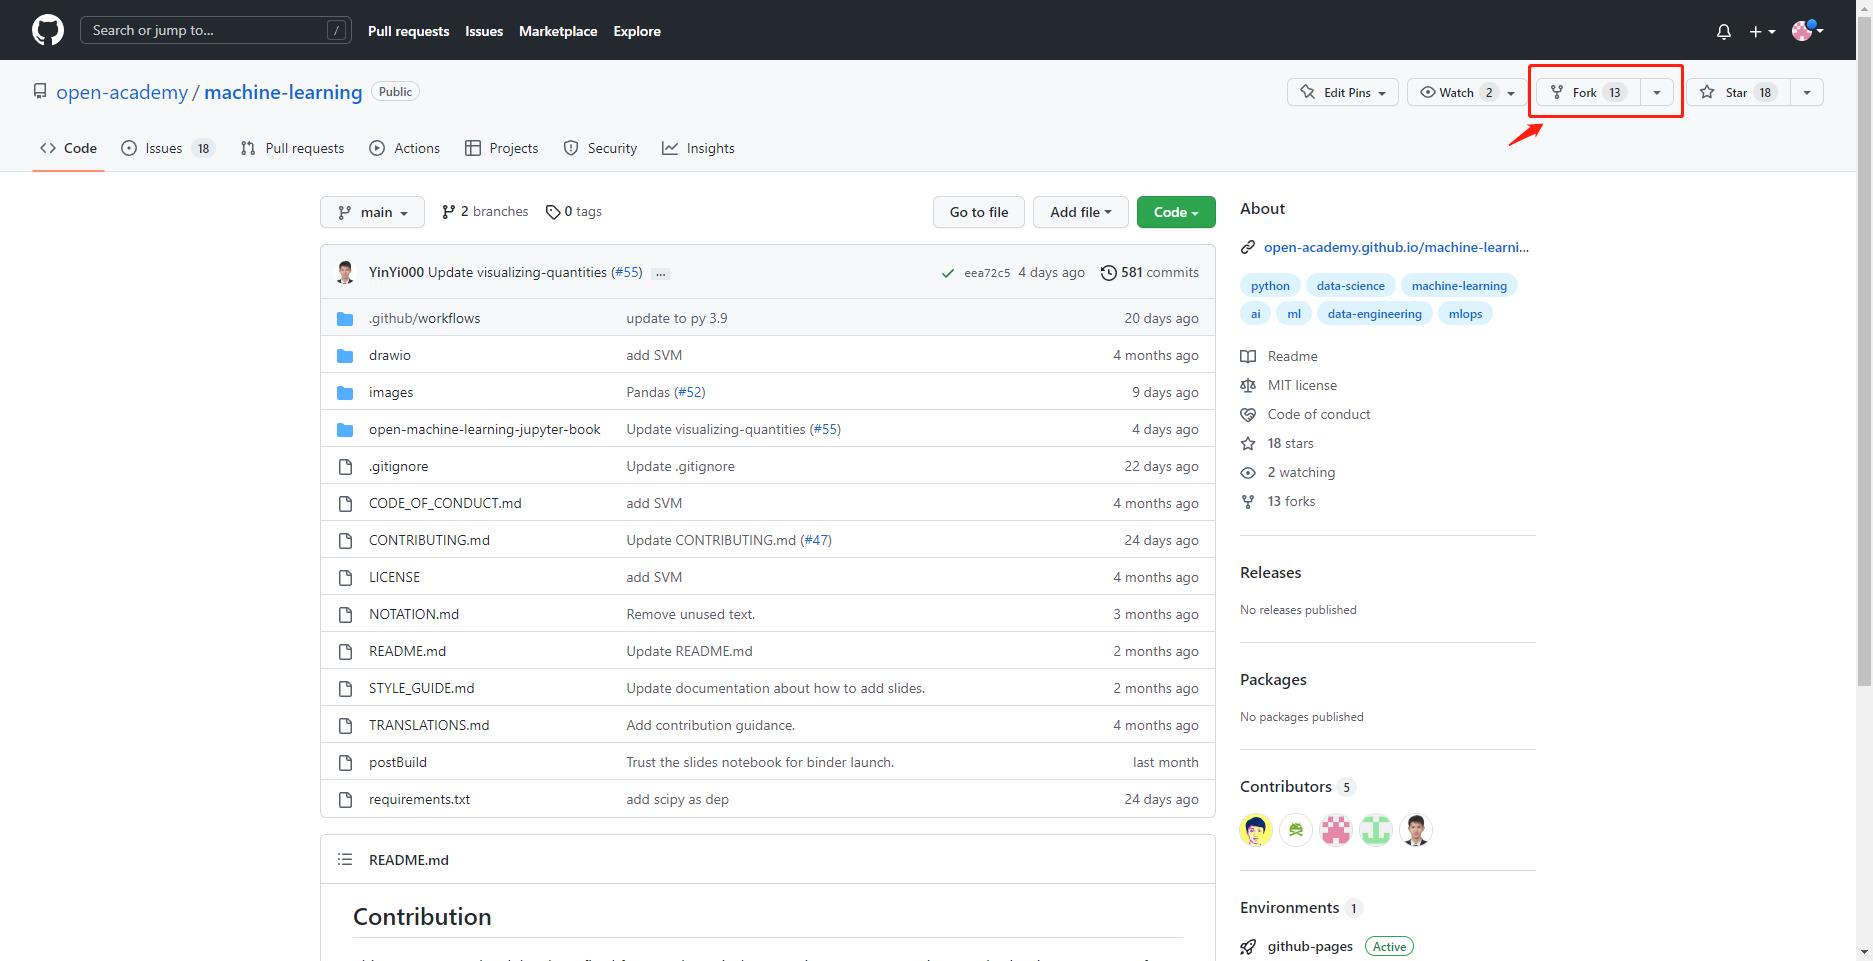
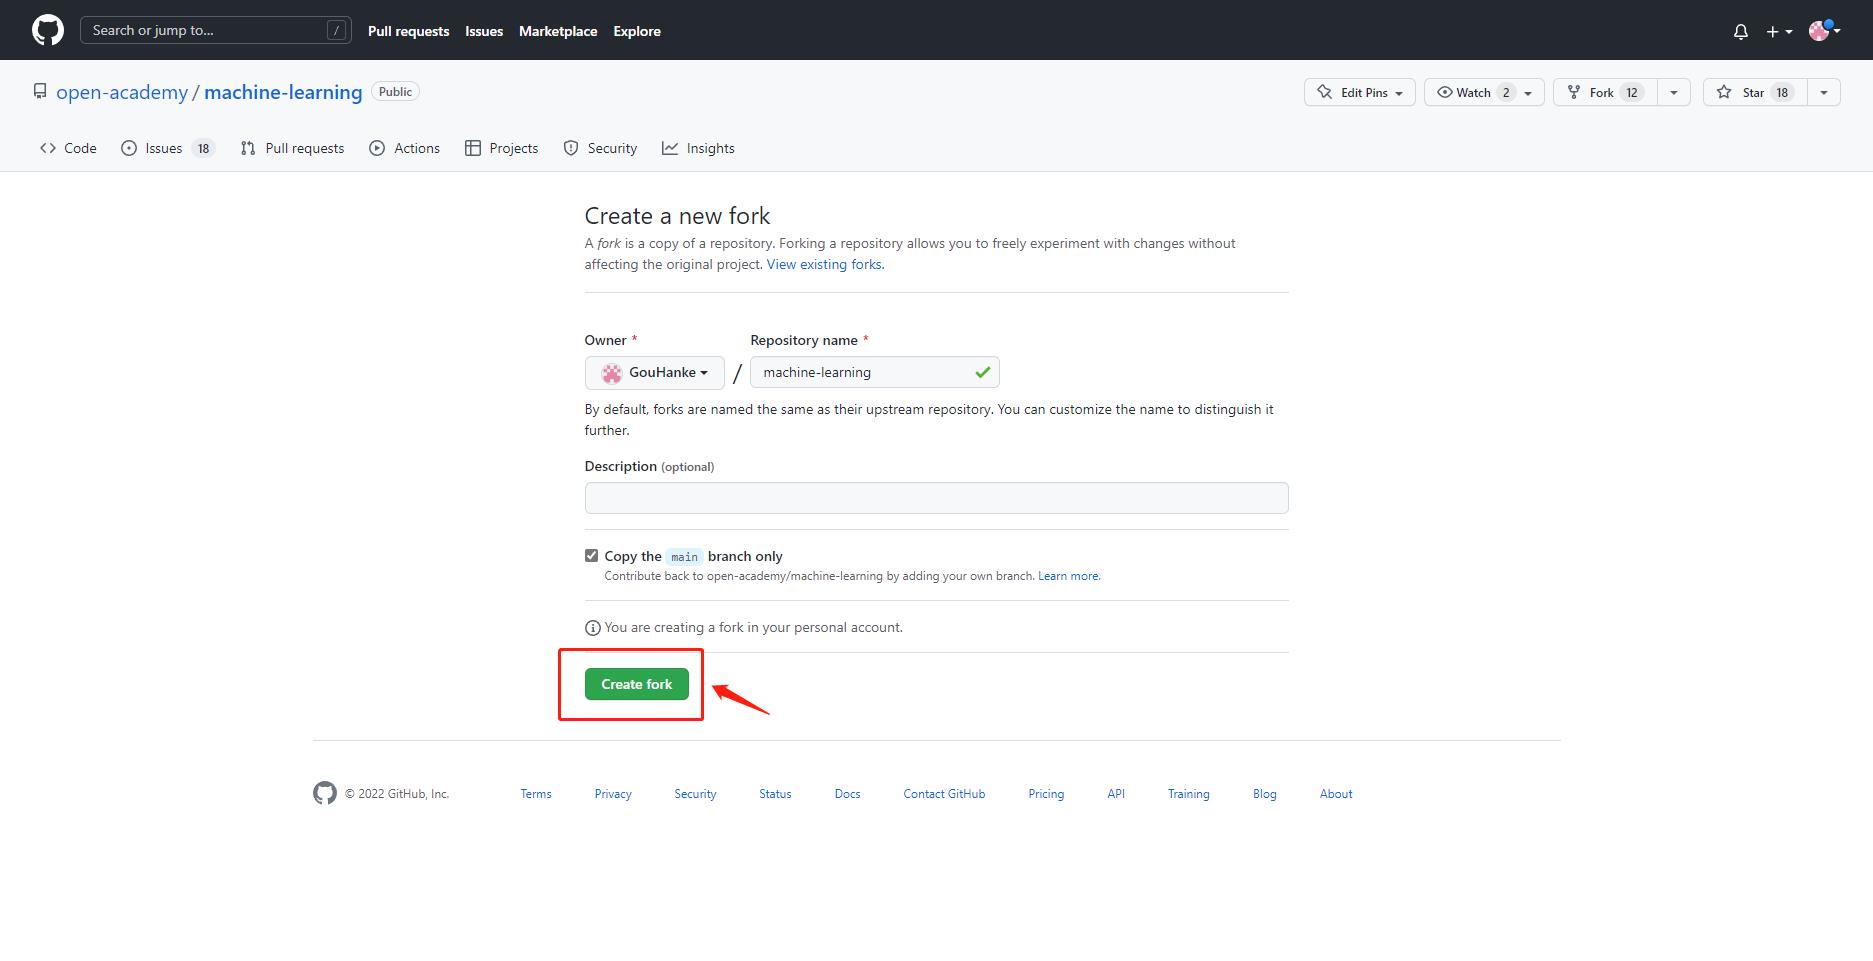
[First time only] Fork the repo under your own GitHub account.
[First time only] Create a test branch on your repo forked above, which MUST be named as
assignment.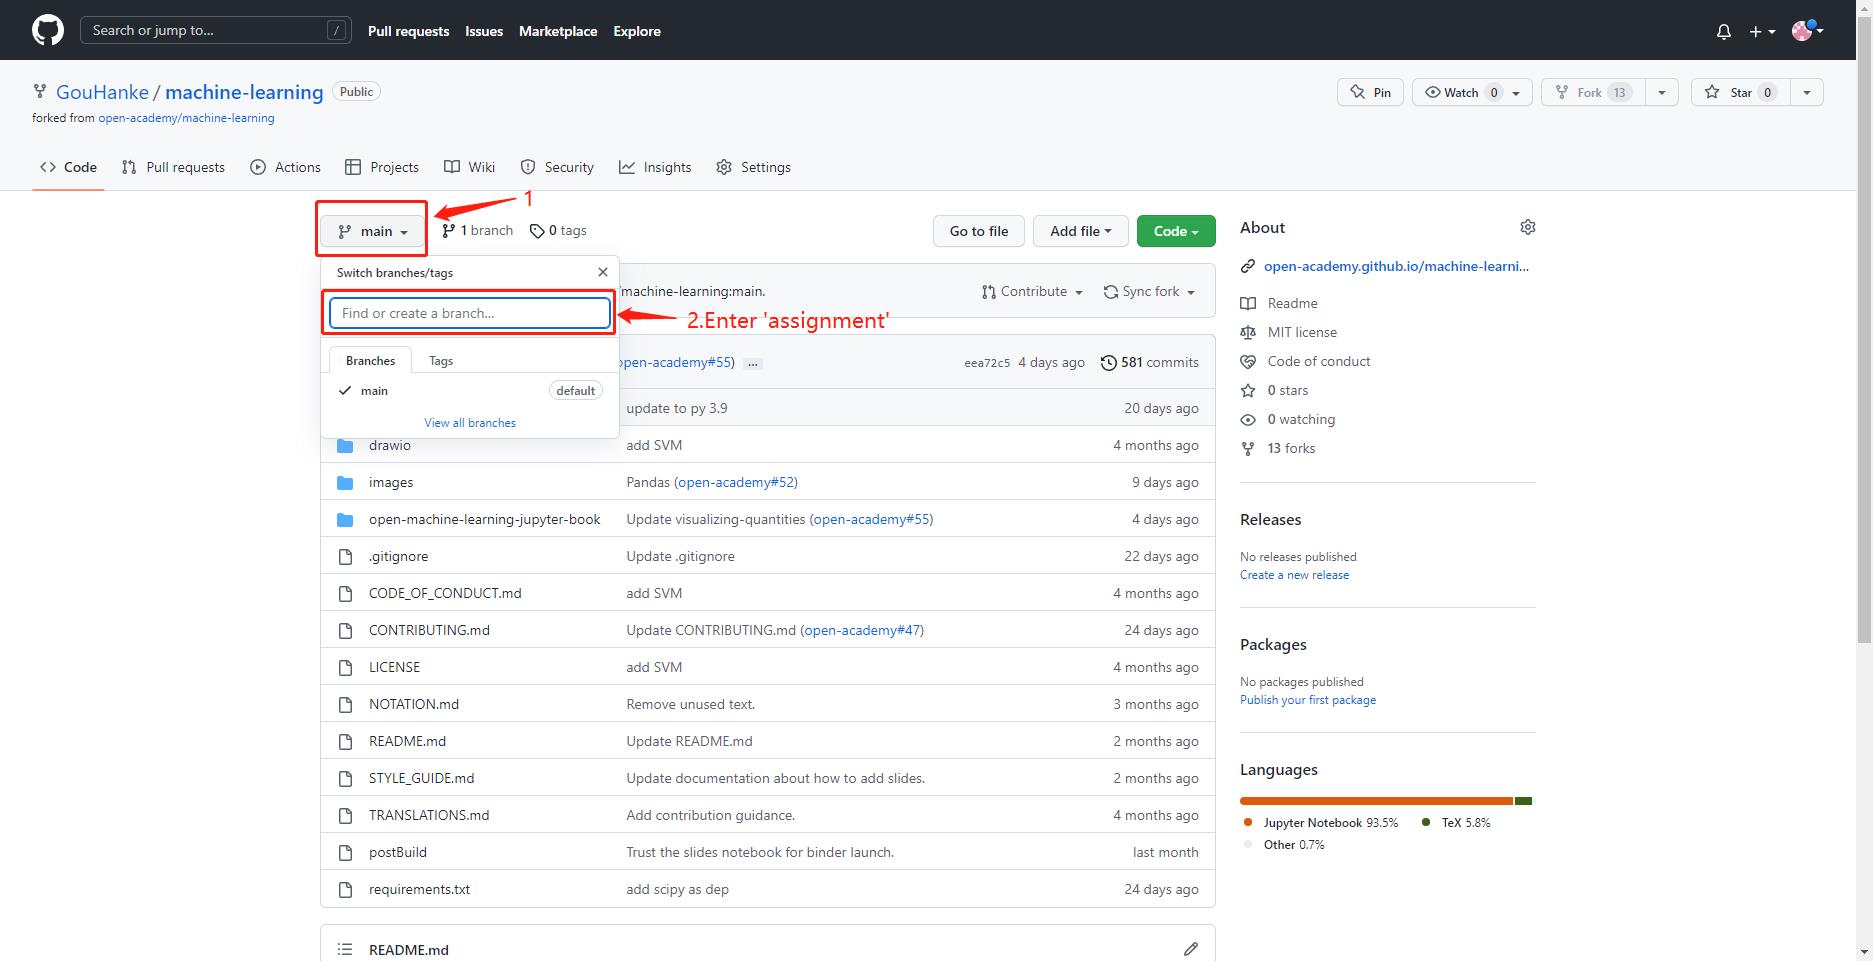

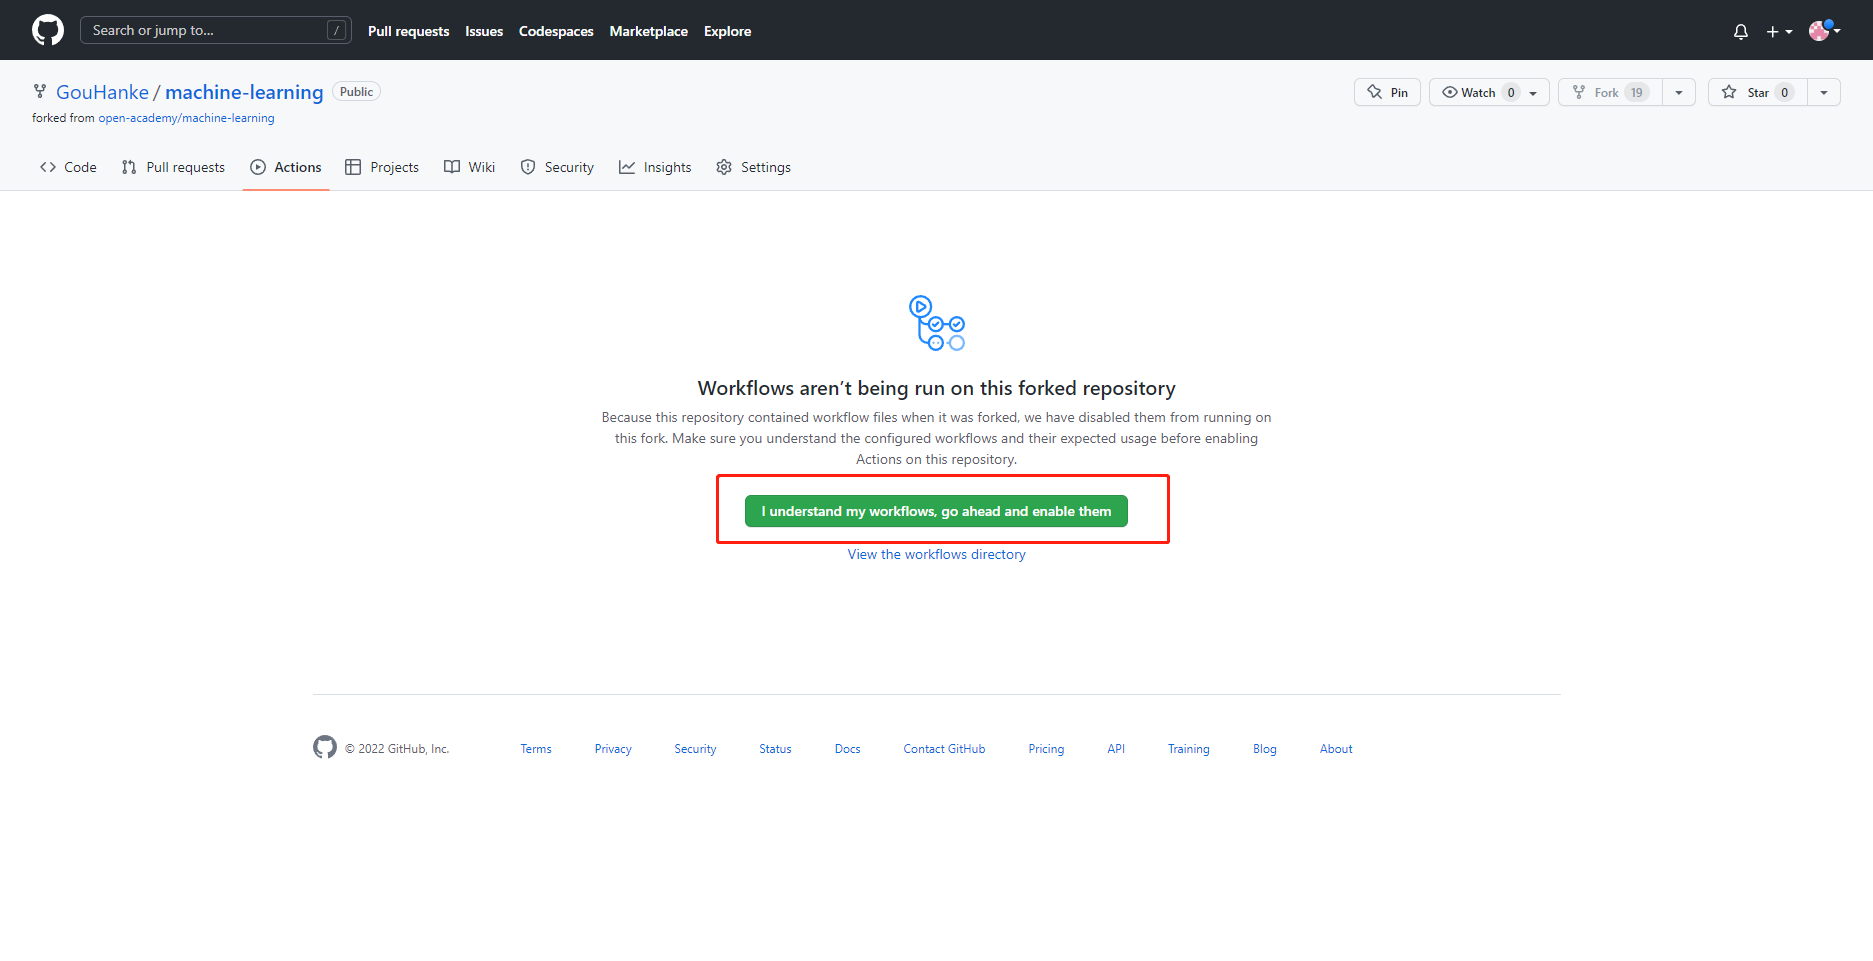
[First time only] Enable GitHub Actions for your forked repository.
[First time only] Clone the repo to your local, and switch to the
assignmentbranch.

git clone <the url just copied>
cd machine-learning
git checkout assignment
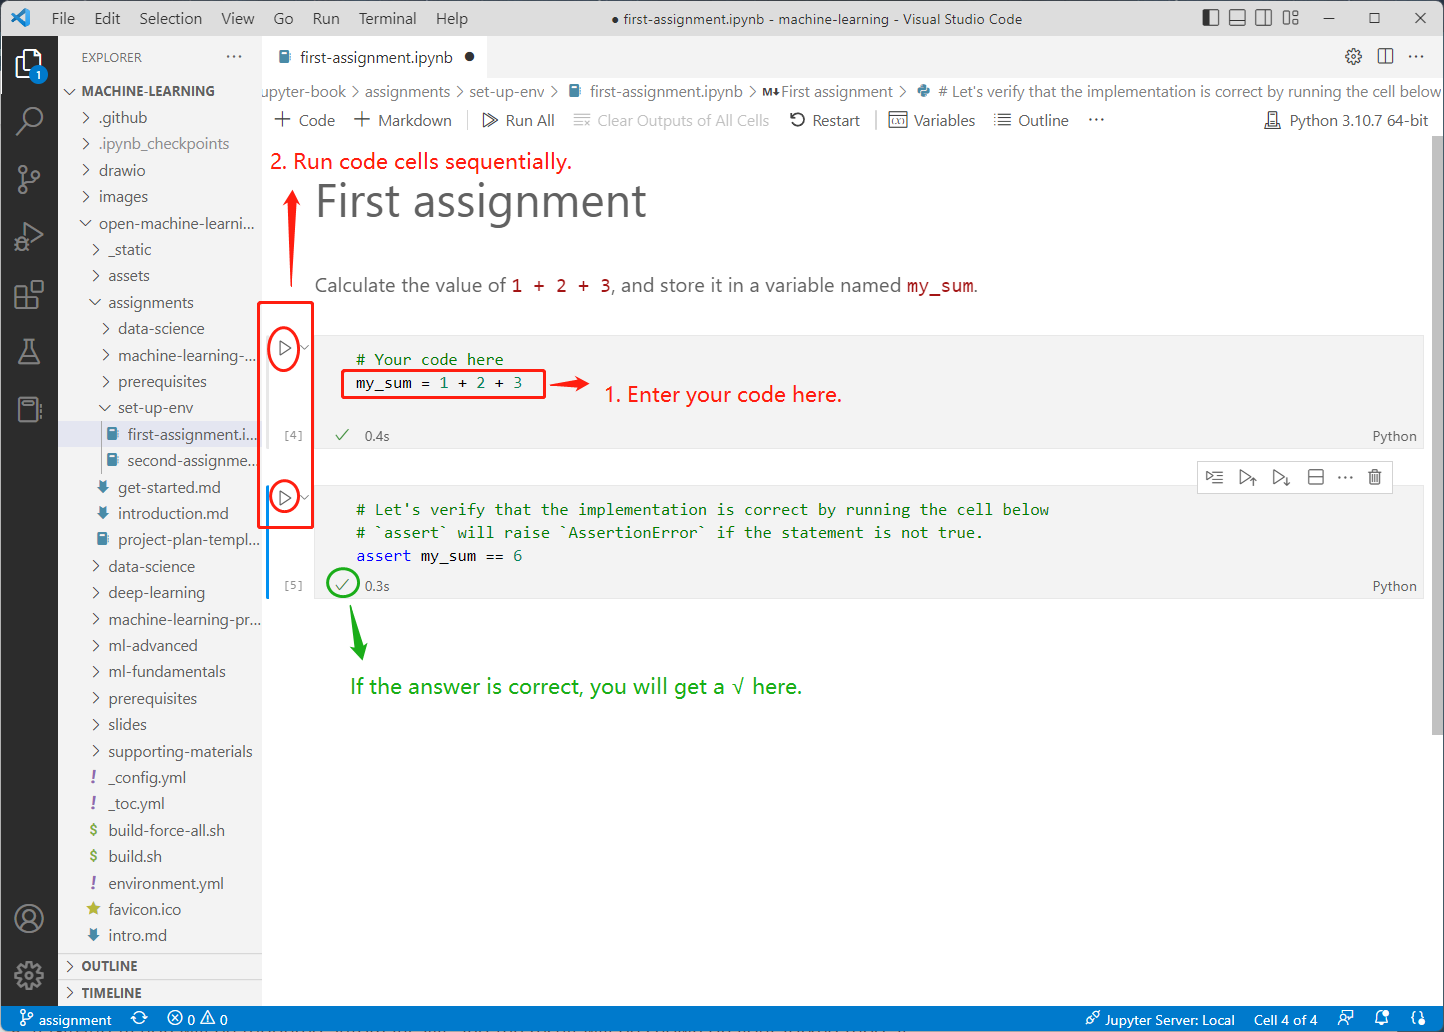
Work on the assignment locally by following the instructions provided in the Jupyter notebook. Test your code by executing the corresponding notebook cells inside the assignment.
[Optional] Make sure that your code can pass local
pytesttest, by taping in the terminal :pytest --nbmake <YOUR-ASSIGNMENT-JUPYTER-FILE>.ipynb
Commit & push the local changes to remote once you finish the assignment.
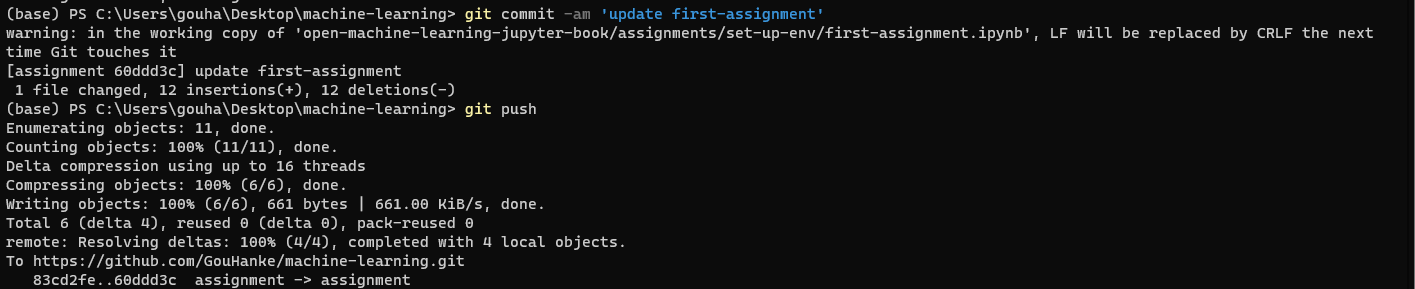
git commit -am '<description>'
git push
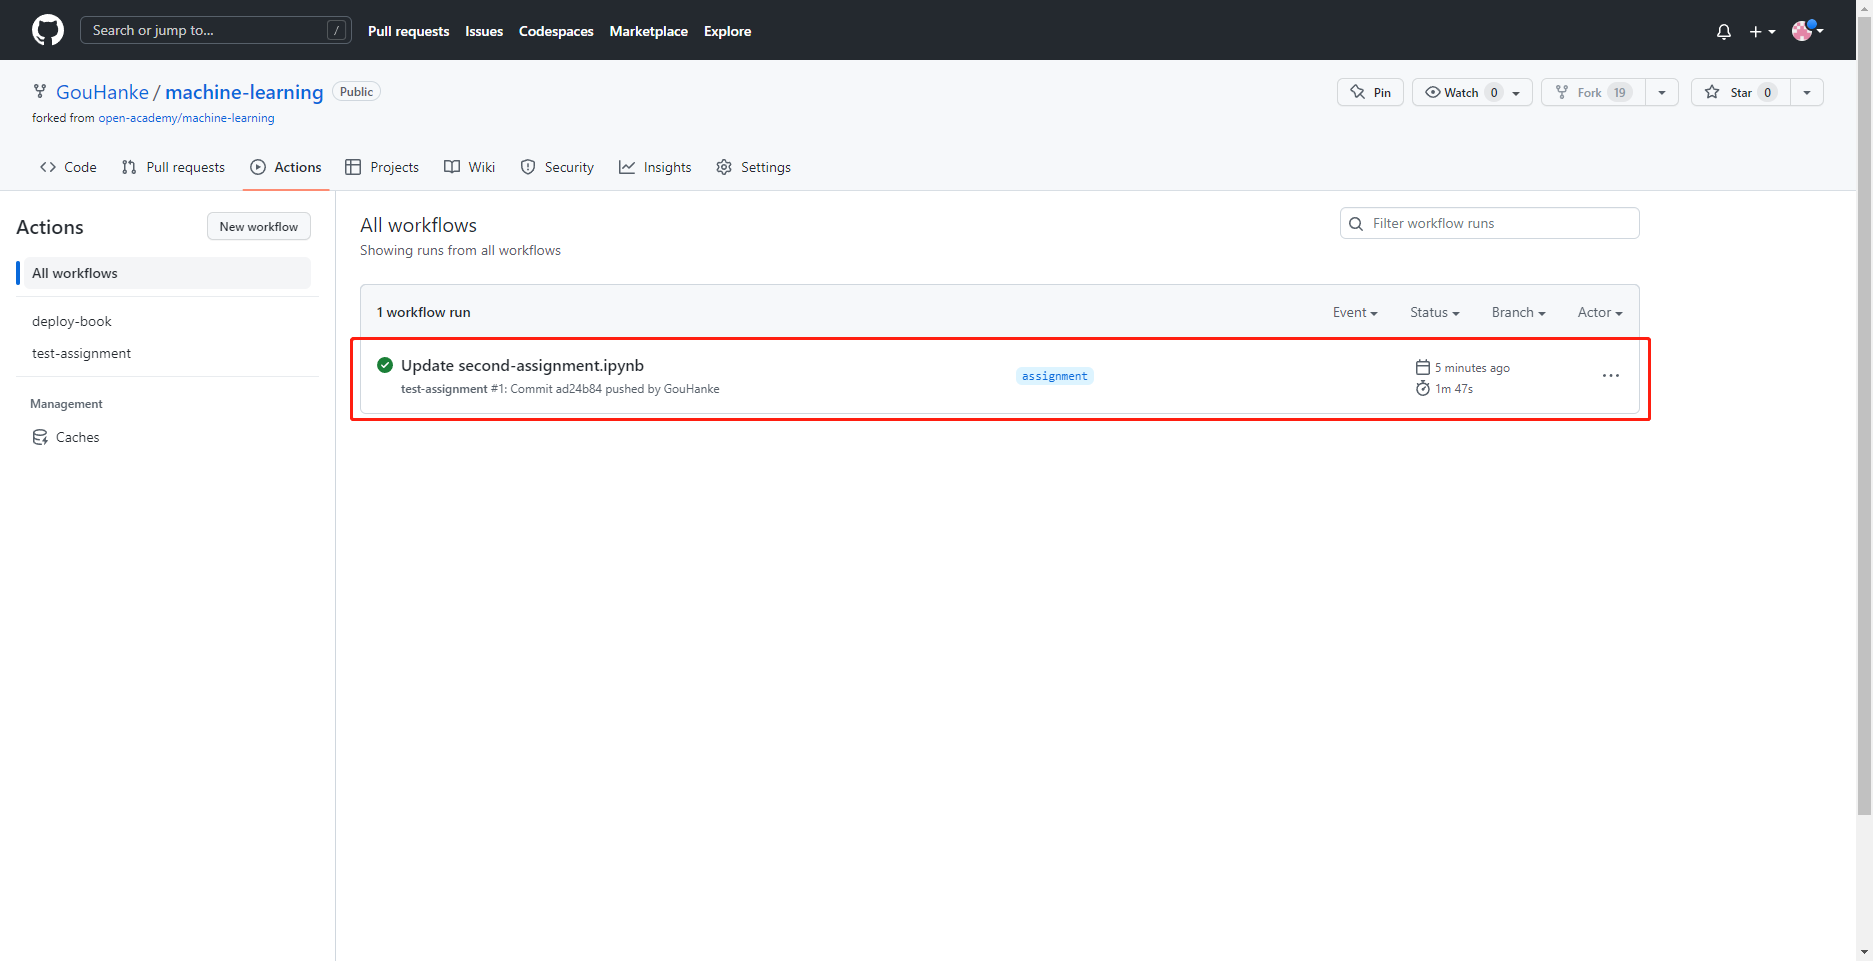
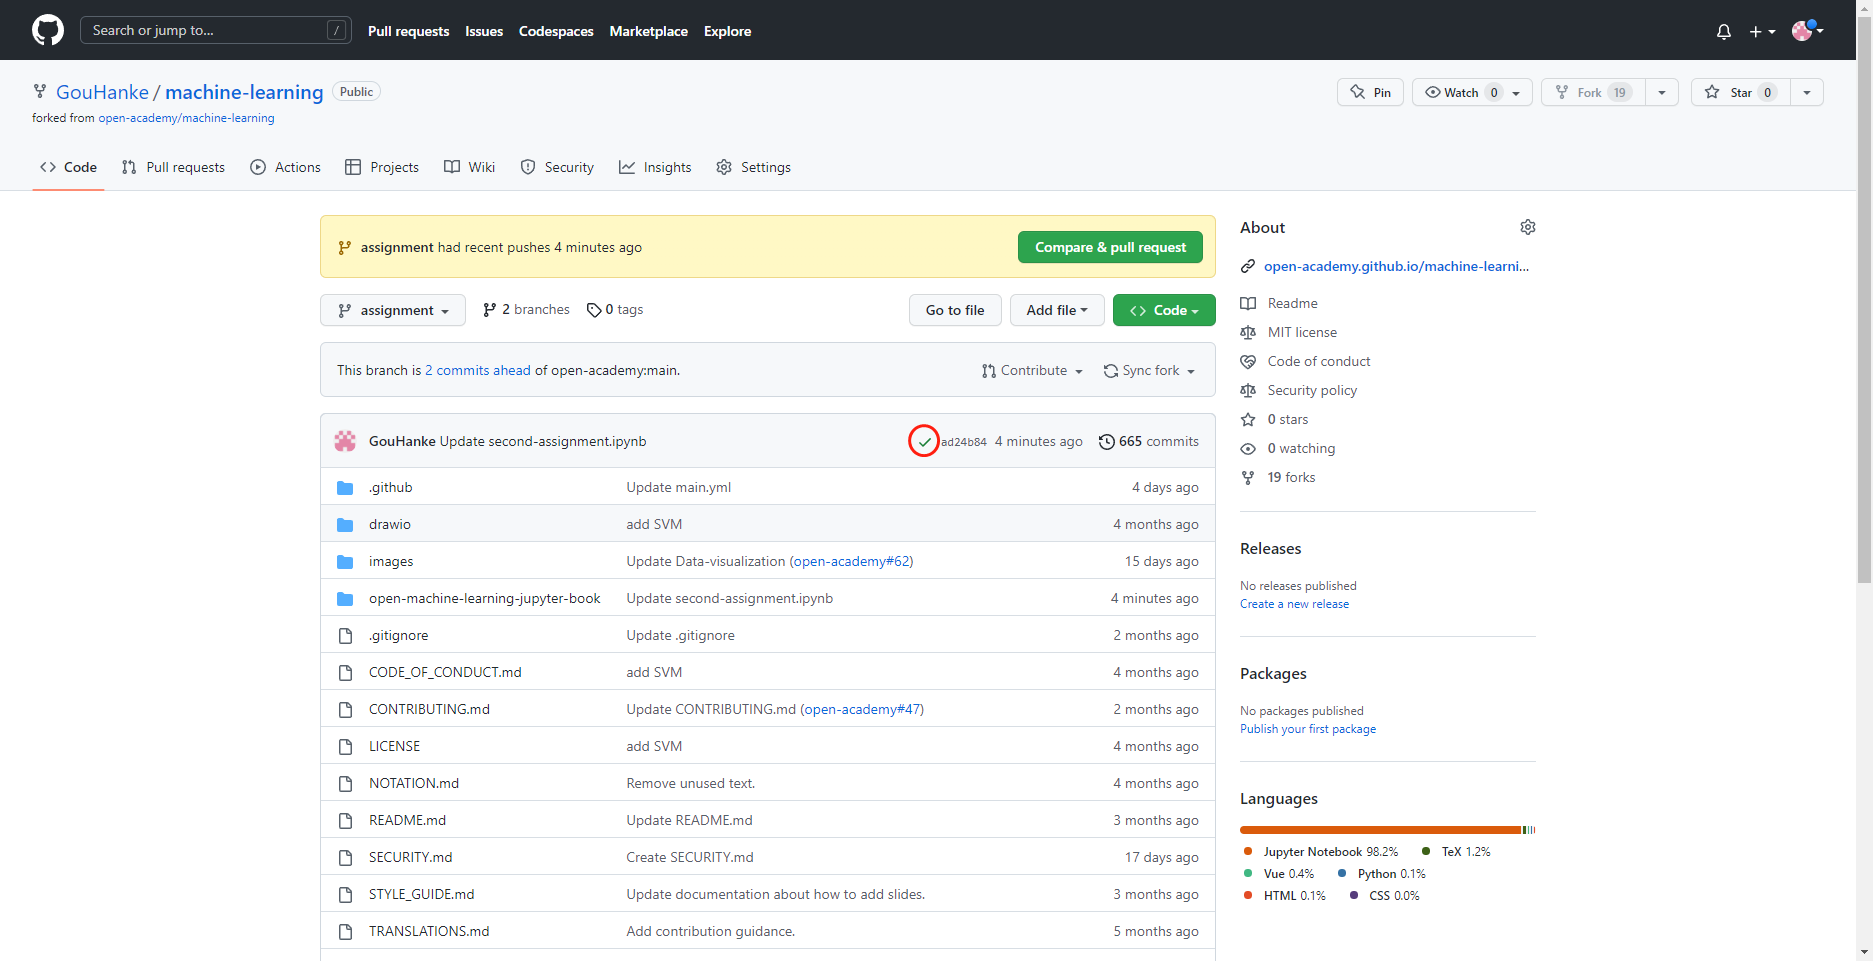
A GitHub Action will be triggered automatically, and the result will be shown on your forked repo at GitHub.
Starting from your second assignment, you need only follow Step 5-Step 8. Note that Step 6 is optional and you can skip it without any issue.
You don’t need to finish all the assignments at the same time. Only the changed file will trigger the verification from GitHub after being pushed to the remote. You could also debug the code by checking the error log from the GitHub Action execution.
11.1.4. How does this work?#
The assignment is fully automated by leveraging GitHub Action. The action is defined by assignment.yml, which handles the continuous integration workflow post a code push. It listens to the code change under open-machine-learning-jupyter-book/assignments path, gets the changed files, and runs unit testing against them.
pytest is the testing framework used for the assignments. To support unit testing for the Jupyter Notebook, nbmake is used as a plugin together with pytest.
11.2. Development#
11.2.1. Environment#
The environment is managed at assignments-binder-requirements by following this.
To update the environment,
go to assignments-binder-requirements and update the
requirements.in.update the
environment.ymlto match therequirements.inmentioned in step 1.